


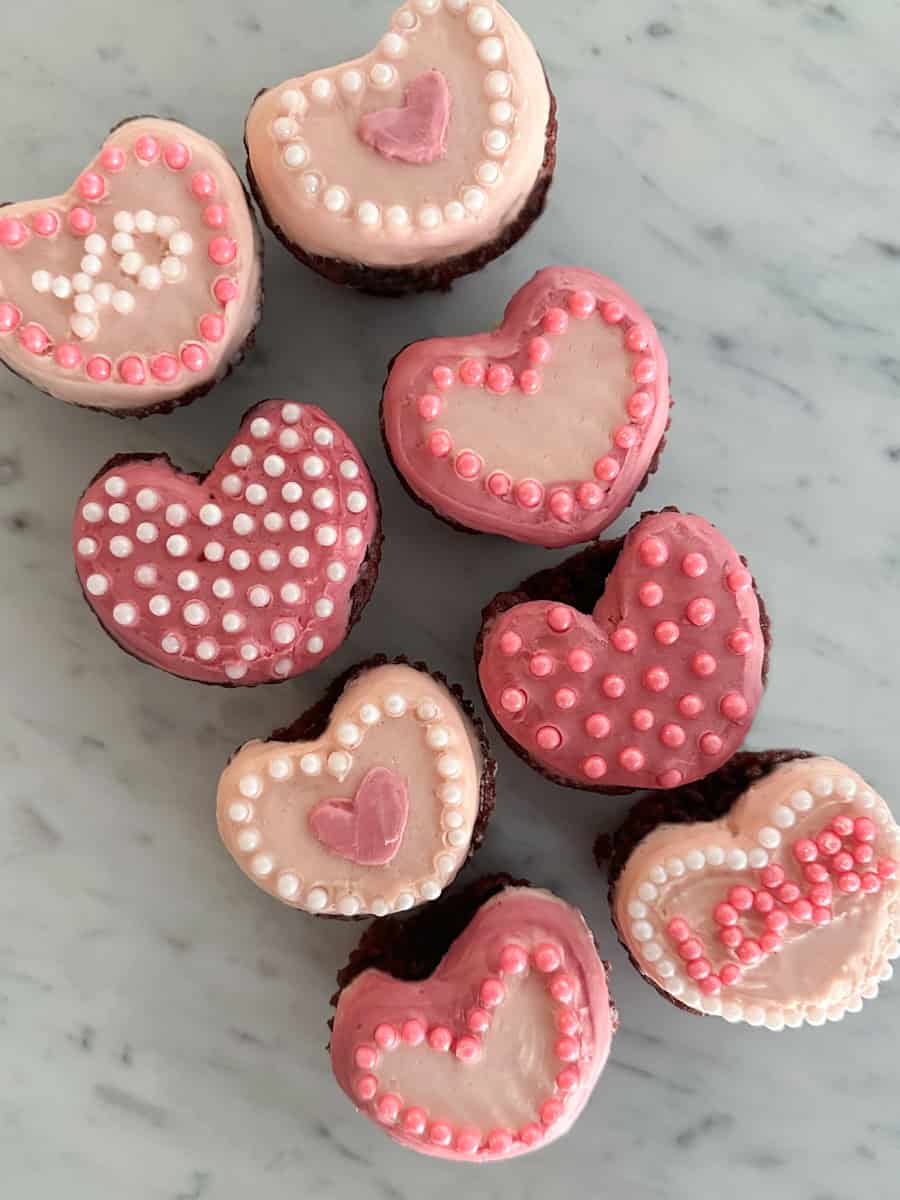
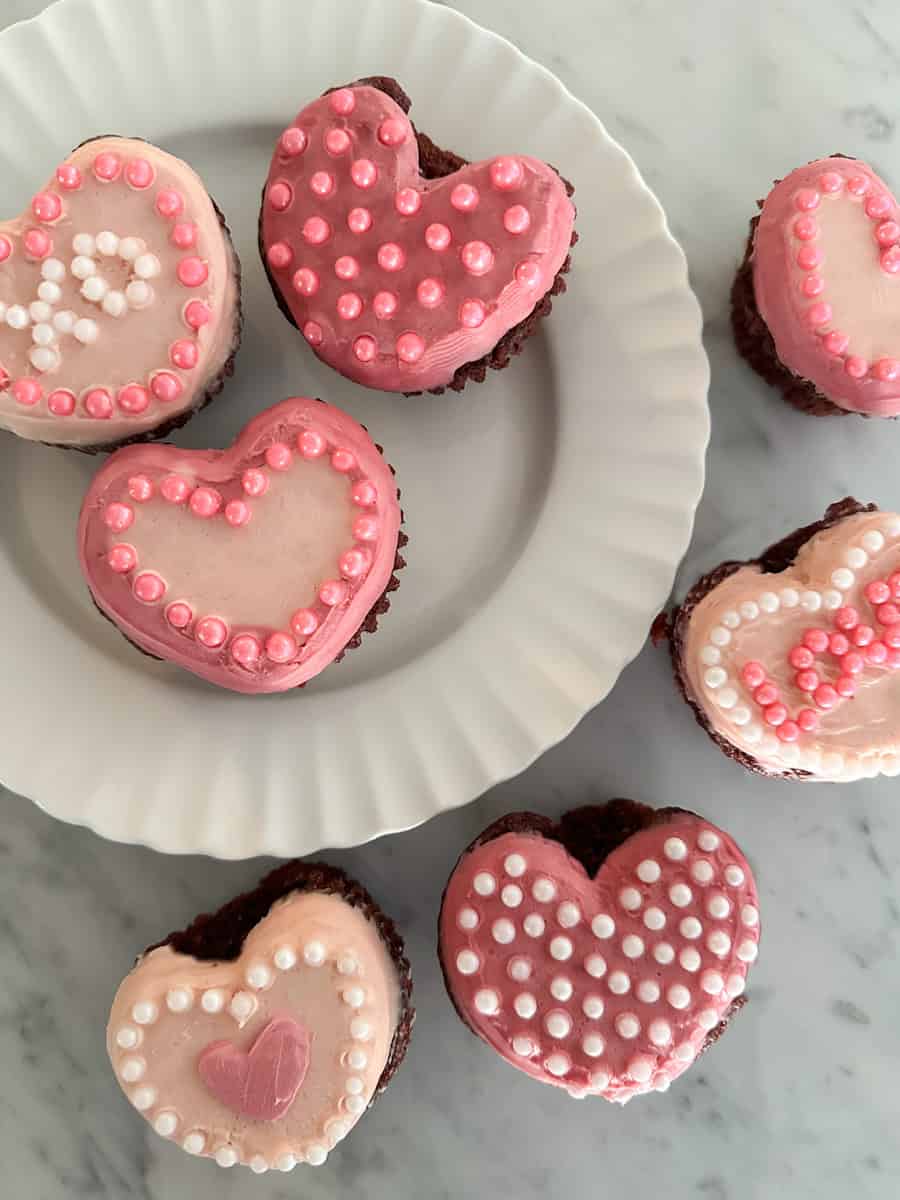
I was recently invited to a Valentine’s Day dessert swap, and naturally, I wanted to bring something festive but with a little twist: red velvet heart cupcakes topped with a whipped buttercream frosting.
In our home, red velvet reigns supreme – though I’ll admit, I have an even softer spot for cherry chip! But even as a cherry chip fan, I can’t deny how incredible this red velvet recipe is. It strikes the perfect balance of flavors: rich with a hint of chocolate, lightly tangy, and just sweet enough to leave you wanting more. To top it off, baking these cupcakes into perfect little heart shapes instantly makes them feel extra special. And the best part is you don’t even need a heart-shaped cupcake tin to make them!
Ingredients For The Red Velvet Heart Cupcakes:
1/2 cup of plain hot coffee
1/4 cup cocoa powder
2 1/4 cups all-purpose flour
1/2 teaspoon baking powder
1 teaspoon baking soda
1 teaspoon salt
2 cups granulated sugar
1/2 cup vegetable oil
1/2 cup butter (melted)
2 large eggs (room temperature)
1 egg yolk (room temperature)
1 cup buttermilk (room temperature
2 teaspoons vanilla extract
3 teaspoons red gel food color
1 teaspoon white vinegar
1-2 cans Betty Crocker whipped buttercream frosting
red food coloring
pink and white pearl sprinkles
wax paper
Instructions For Red Velvet Heart Cupcakes:
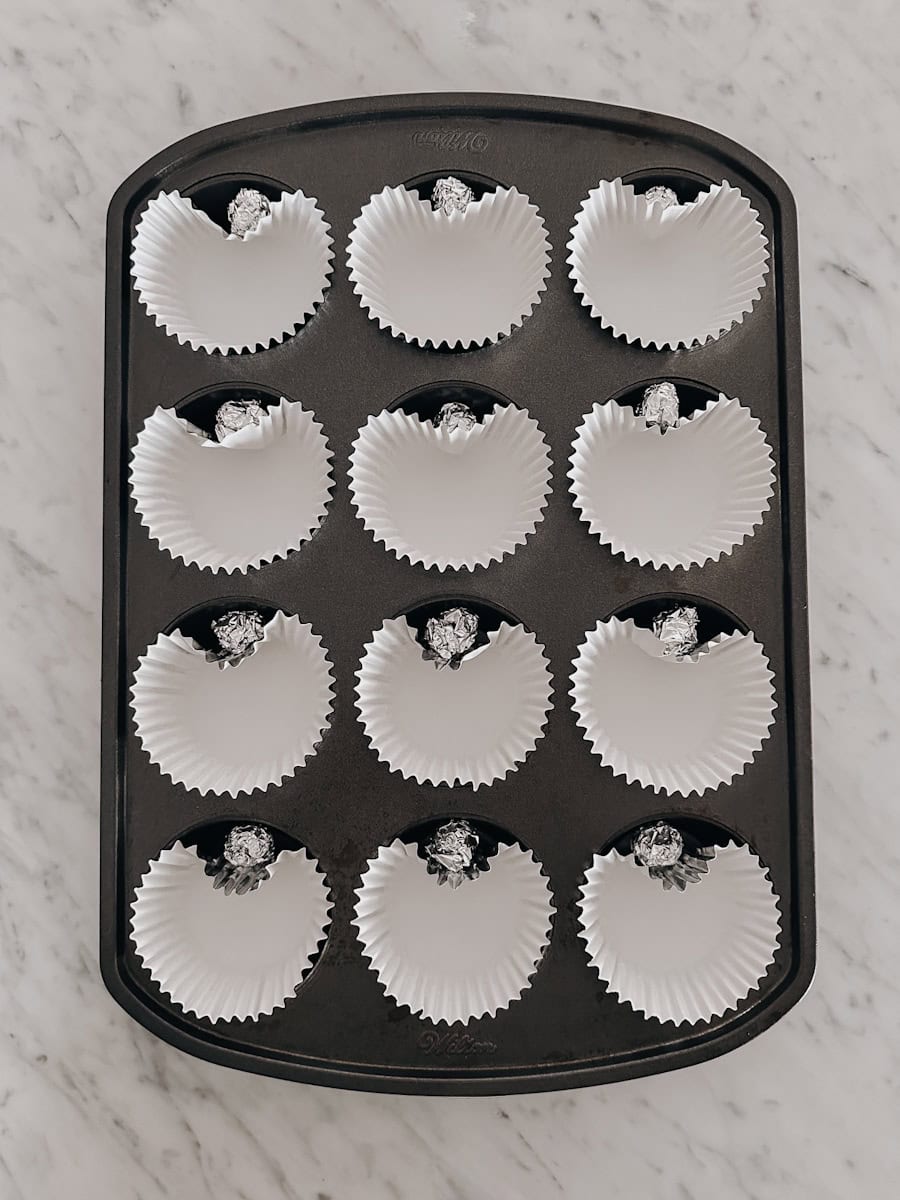
- Preheat oven to 325°F. Line 2-3 cupcake pans with parchment cupcake liners.
- Cut foil into 1 x 5 inch strips. Roll foil strips into balls and place at the top of each cup between the parchment paper and tin to form a heart shape.
- In a small glass mixing bowl, combine the hot coffee and cocoa powder. Stir thoroughly and set aside.
- In medium sized mixing bowl, combine the flour, baking powder, baking soda, and salt. Gentle whisk together for about 10 seconds.
- In a large mixing bowl, combine the sugar, vegetable oil, and melted butter. Stir to combine. The mixture should be thick and not runny.
- Add the eggs and yolk to the sugar mixture and whisk until well combined. Then, whisk in the buttermilk, vanilla, and gel food coloring until batter is evenly red throughout. Finally, add in the vinegar and coffee mixture and whisk for twenty seconds or until well combined.
- In the large mixing bowl, slowly begin adding in the flour mixture, stirring continuously until well incorporated.
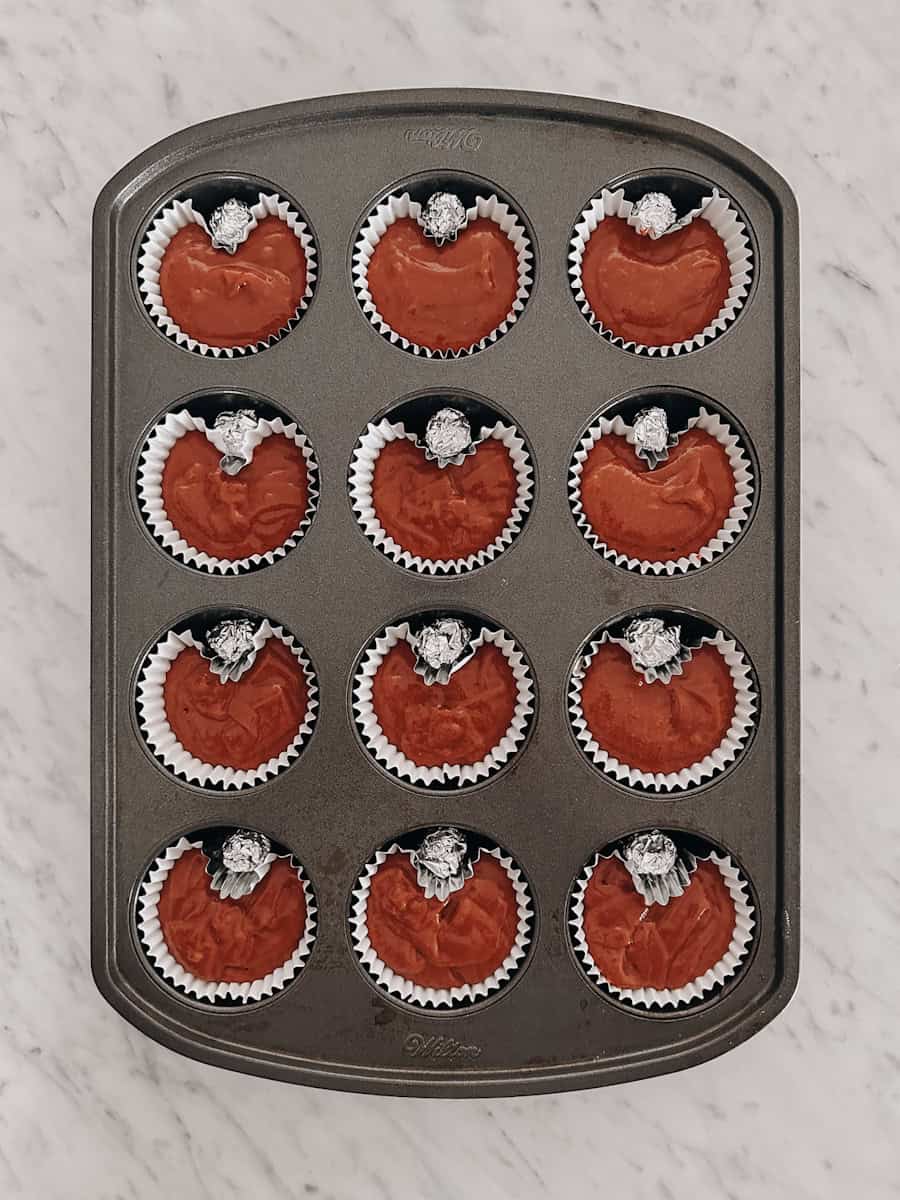
- Fill each cupcake tin until cups are halfway full. Be careful not to overfill.
- Bake for 20-25 minutes, keeping a close eye on the cupcakes to not overcook. If the cupcakes are springy in the middle, they are done baking.
- Remove the cupcake tins from the oven and place on cooking rack. Once the tins are cool enough to touch, remove the cupcakes and leave them to continue cooling on the wire racks.
Instructions For Whipped Buttercream Frosting:
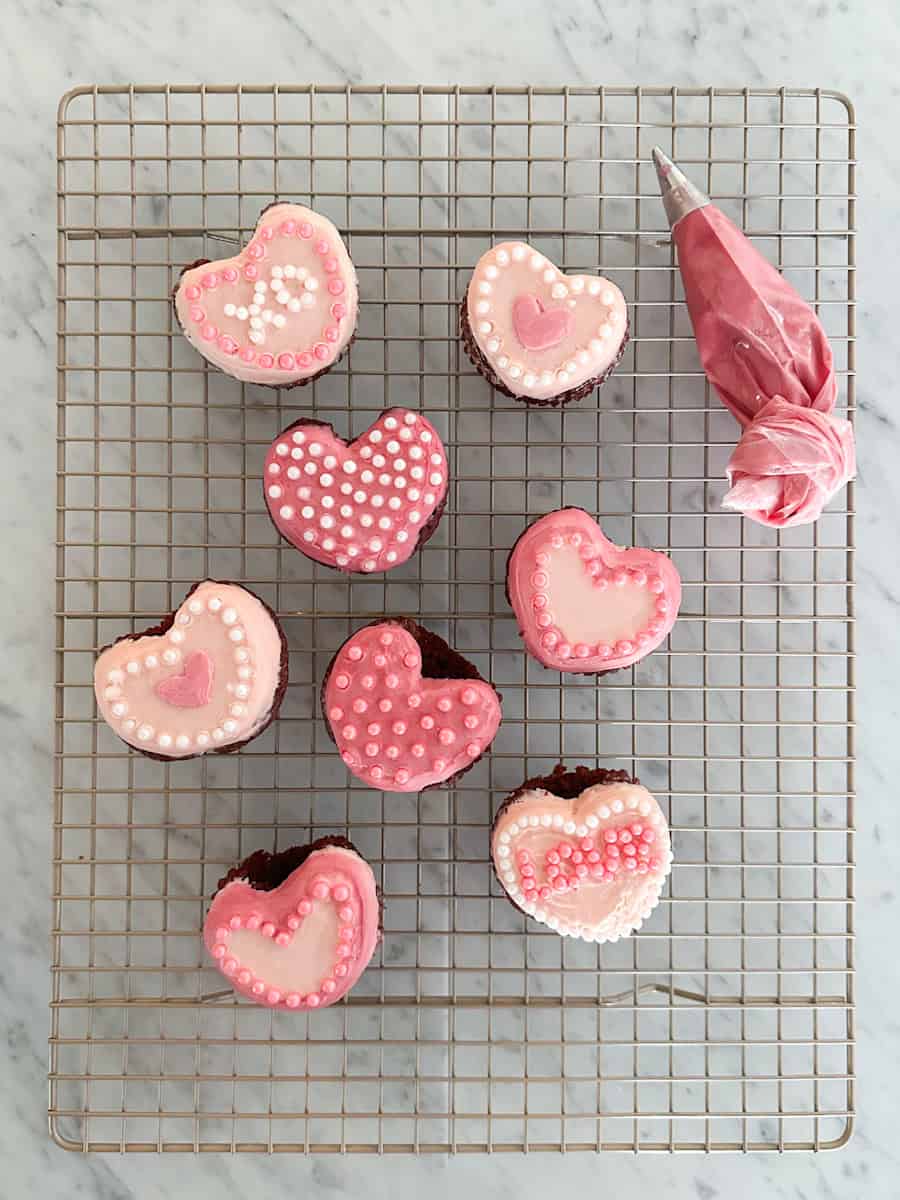
- While cupcakes are cooling, take the buttercream frosting and place into a mixing bowl. Add desired amount of food coloring, and whip with a hand mixer until light and fluffy. Continue mixing and adding food coloring to get your desired frosting color.
- Once the cupcakes are completely cool, frost with a spatula. For a smooth top, place the frosted cupcakes upside down onto a sheet of wax paper. Place in the refrigerator for 15-30 minutes (or until the icing has hardened). Remove the refrigerator and shape with a warm icing knife.
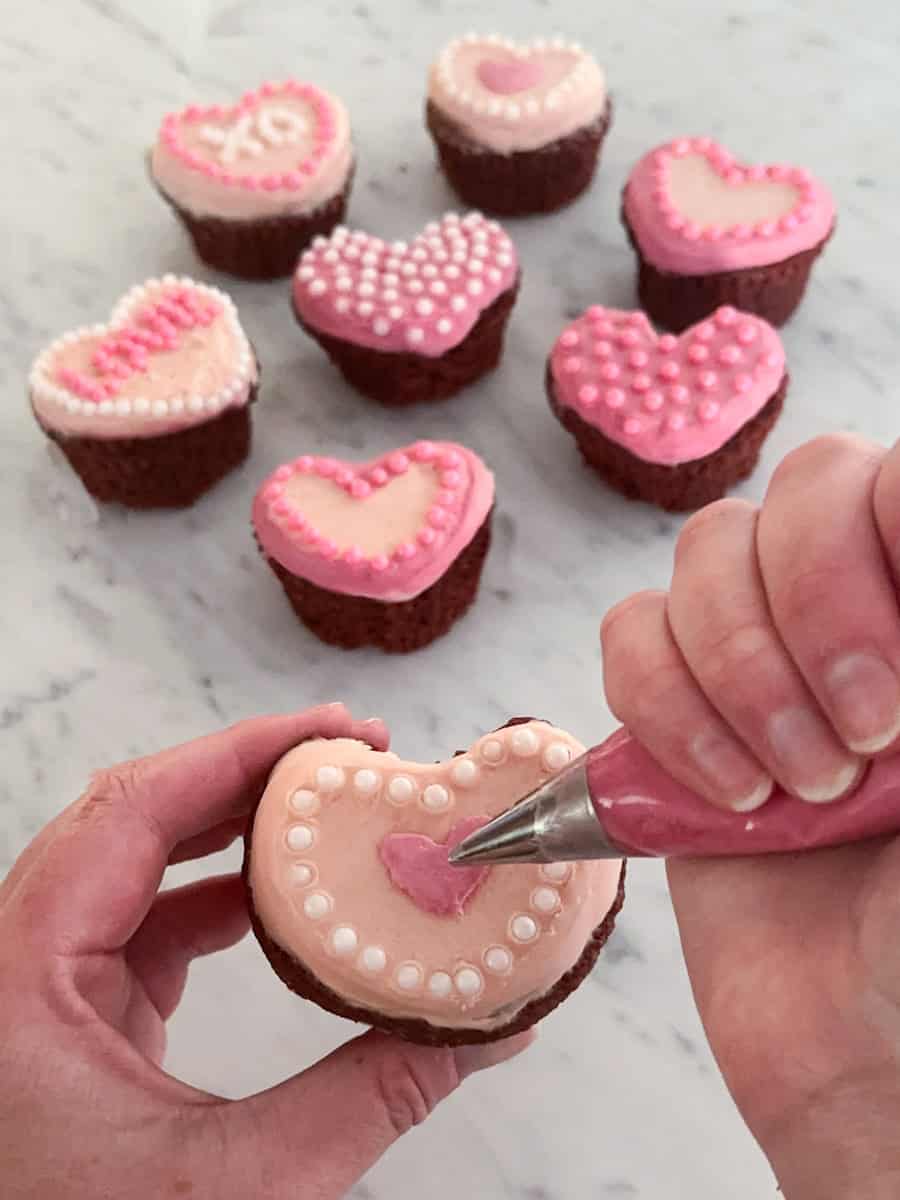
- Decorate and enjoy!
Notes:
Don’t Overfill the Cupcake Cups: Fill each cupcake liner only about halfway to 2/3 full to ensure your cupcakes rise evenly. Overfilling can cause them to spill over and lose their shape, while underfilling can result in flat cupcakes.
Tap the Pan to Remove Air Bubbles: After filling the cupcake liners, gently tap the pan on the counter a few times. This helps release any trapped air bubbles and ensures a smooth, even rise.
Use Room Temperature Ingredients: For the best texture, make sure your eggs and buttermilk are all at room temperature. Cold ingredients can cause the batter to seize up and affect the fluffiness of the cupcakes.
Sifting Your Dry Ingredients: Sifting the flour, cocoa powder, and baking soda ensures there are no lumps and helps create a light, airy cupcake with a uniform rise.
Storing Your Cupcakes: To keep your red velvet heart shaped cupcakes fresh, store them in an airtight container at room temperature for up to 3 days. If you need to store them longer, keep them in the refrigerator for up to a week. Just be sure to let them come to room temperature before serving to enjoy their full flavor and softness!
Whipping The Buttercream Frosting: Using store-bought frosting can save you time while still giving you a delicious, homemade taste. To take your canned frosting to the next level, you can add a little powdered sugar, milk, or cream to sweeten and change the consistency. For an extra burst of flavor, a teaspoon of vanilla extract makes all the difference.
Happy Valentine’s Day!
If you give these Red Velvet Heart Shaped Cupcakes a try, I’d be thrilled to hear all about it! Share your tips, experience, or leave a comment rating this recipe. And if you post a photo of your cupcakes, don’t forget to tag me on Instagram. I love to see how you make these recipes your own!


+ Show / Hide Comments
Share to: