If there is one good thing that has come out of this surprise renovation project it is that our existing primary bathroom layout is incredibly functional. Even though I have experience in redesigning bathrooms, I must admit that an already well designed interior saves a considerable amount of time in terms of design work!
It’s no secret that renovations tend to be less complicated than remodels, so understanding what makes a good floor plan is essential to saving your time, money, and energy. Today I’m sharing with you the reasons why our current primary bathroom layout works, what I would change if I was starting from scratch, and a breakdown of our construction plans to bring this space up to date.
Existing Primary Bathroom Layout: The Pros

Have you ever found yourself knee-deep in a bathroom renovation and feeling like you’re drowning in endless floor plan possibilities? Trust me, I’ve been there – so I’m super grateful that the bones of this bathroom are already perfectly laid out. Overall, the use of space and existing flow is super efficient. I believe the previous owners remodeled this part of the home, so whoever designed the layout did a great job!
Some of the pros of this space include: a nice-sized walk-in steam shower, a 9′-0″ two person vanity, a private water closet, and a free-standing tub. The tub is also nicely tucked into a little alcove and centered under a large window.
Honestly, this primary bath checks all of my must-have’s in terms of function and layout.

We also have a radiant floor heating system and let me tell you – I will never go back. This room sits on the northeast side of our house and it is always cold. You wouldn’t believe how much the radiant floor heat makes a difference! Not to mention, there is nothing nicer than stepping onto a warm floor when the temperatures drop during the winter.
When we originally assessed the damage from the plumbing leak, we made sure that our insurance would replace this part of the flooring. For us, it isn’t just a nice to have – it is an absolute must have.
Now onto the Cons..
Existing Primary Bathroom Layout: The Cons

My biggest dislike about this bathroom is that we don’t have a locking door. From our primary bedroom, the main entrance is a pocket door. It’s not my favorite, but I’ve gotten used to it pretty quickly. We also have to enter our closet from inside of the bathroom. Surprisingly, I actually like having the closet in the bathroom as it makes our primary bedroom feel cleaner.
One other item I have mixed feelings about are the glass doors for the steam shower. On one hand, I love indulging in a super hot shower. On the other hand, I LOATHE trying to keep these glass doors clean. If you have ever had glass shower doors, you know my pain. It is nearly impossible to keep hard water stains and mildew from forming on the glass.
The seal on these shower doors is also starting to get brittle which is causing some minor leaking. I’m definitely going to have our contractors replace the seal to see if that helps, but I’m sure we’ll still have some issues with this.
The Construction Plans

Now, lets chat construction plans. Because of the plumbing leak, our restoration team removed a large section of floor tile, a portion of the radiant floor system & mortar bed, our shower curb, shower pan and floor tile, as well as some of our shower surround. You can see how thick the concrete underlayment is below the tile.
Which leads me to the next part of the scope of work..
All of the tile flooring, mortar bed, and radiant heating system have to be ripped up and reset – including in the closet area if we ever want a working system again. We had the option of only ripping up the tile here and patching the rest, but that came with the caveat of losing this luxury feature. We figured if we were going to fix it, now would be the time to do so.
In addition to the flooring, all of the existing shower tile surround and bench seat has to come out. And, since we are removing the shower tile, we will also need to remove the matching wall tile surrounding the tub.

Considering Our Budget
Knowing our scope of work just increased three-fold, I created a list of the items we could potentially save money on while still making this bathroom feel put-together. Here is what I’m thinking:
The existing vanity is in great shape and would be a huge cost to replace. I’m not loving the cabinet profiles, but I think I can work with it. Besides, a pre-manufactured vanity of that size is easily upwards of $4,500. Not to mention, finding a pre-manufactured, 9′-0″ vanity wouldn’t be easy. This would most definitely need to be a custom piece and could easily work its way upwards of $7,000.
This decision made itself. We’re going to reuse the vanity.

The next items I felt we could save big on are the existing plumbing fixtures. Fortunately, everything matched and is white porcelain or an oil-rubbed bronze finish from Moen. Our tub and toilet are also in good enough shape, so we’ll reuse those too. This is easily a cost savings of $2,500-$3,000. I’m feeling pretty good so far!
We’re also planning to reuse the glass shower doors. Here’s my thought process: if we ever sell this home, a steam shower will help increase the overall value. On average, quality shower doors can range in price from $500-$1,500 and up. It’s kind of a no-brainer that reusing these will save us some cash.
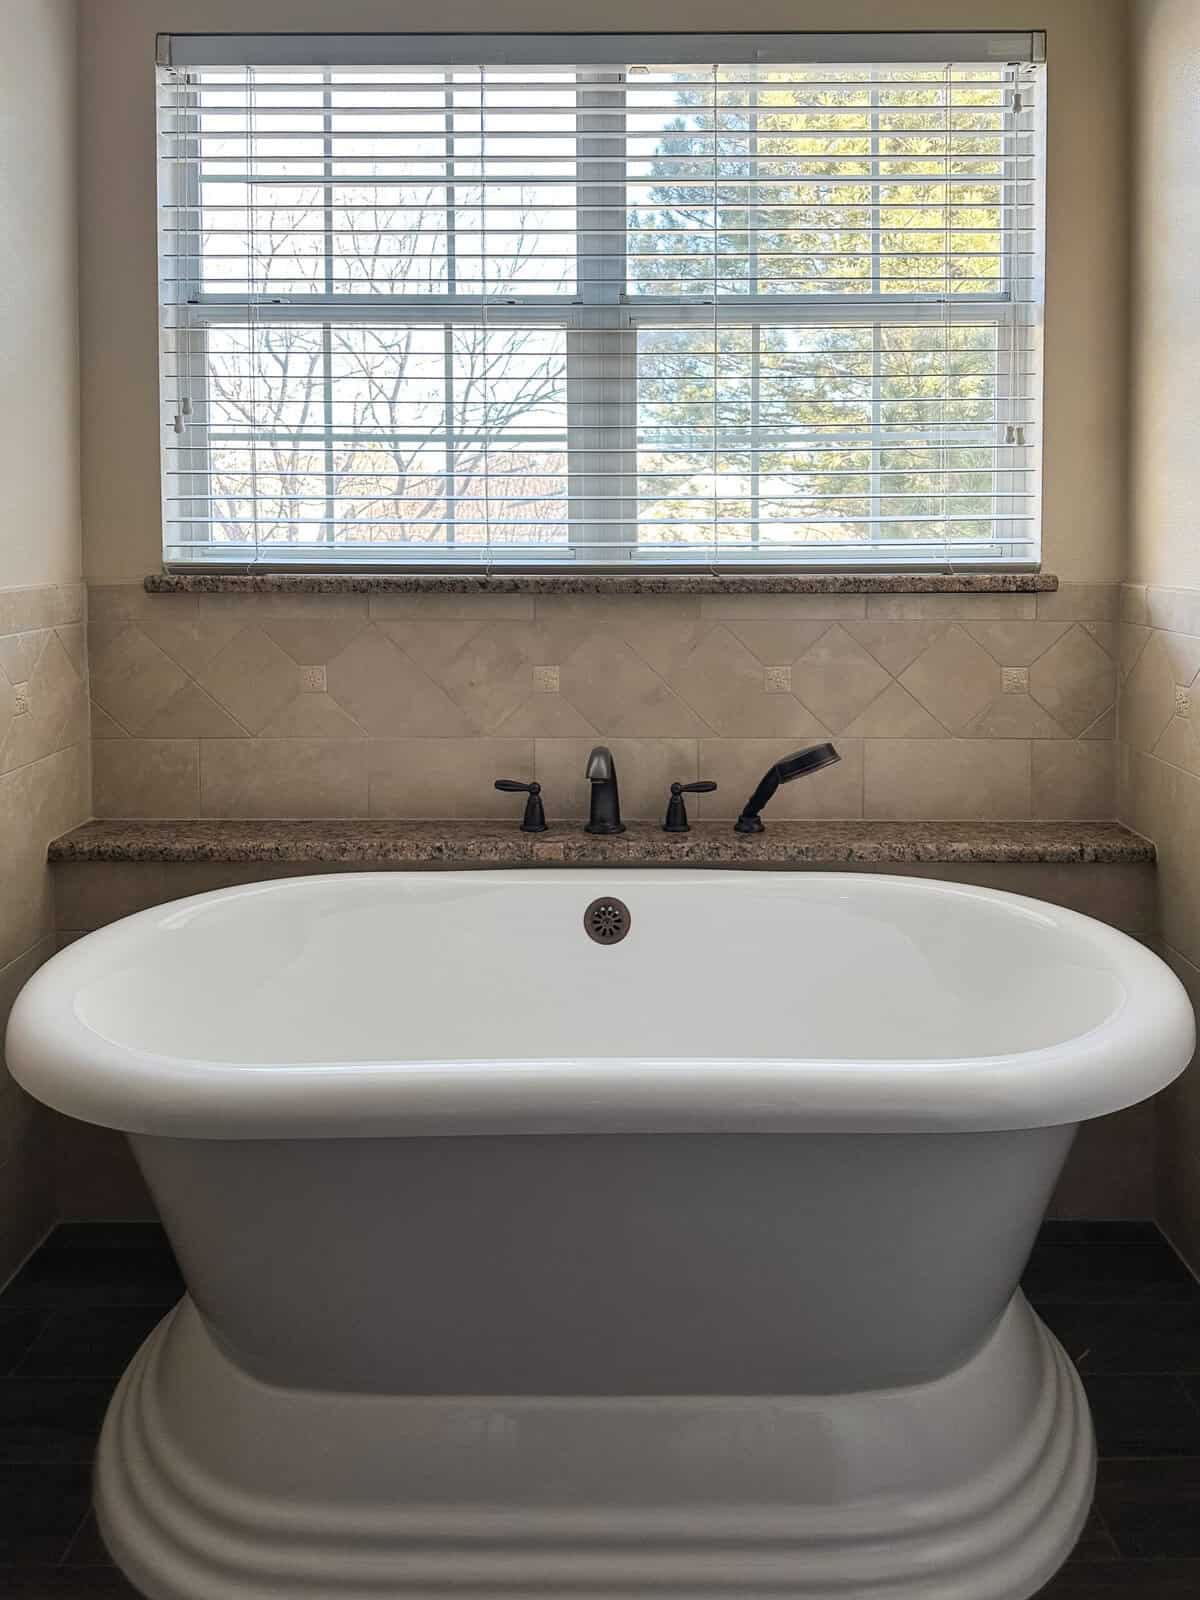
And finally, instead of re-installing tile around the tub walls, we’ll go ahead and just drywall those areas to save on the cost of additional tile. I’m also planning to visit some remnant yards to find a countertop that we can use throughout the bathroom. Keep your fingers crossed for me on this as it will be a miracle to find a slab big enough to cover everything.
Where I’m Splurging
One area I would like to splurge on a little bit is to add some wallpaper to the water closet. I would also like to replace all of the light fixtures as they’re all just a little too outdated to be reused in a new bathroom. However, these are all luxury items, and if we need to wait on installing either of these things, I’m fine with that. They’re nice-to-haves, but you know – its all in the details!
Demo is right around the corner so get ready for some progress updates coming soon!

+ Show / Hide Comments
Share to: